
Introduction: Why Stone Walls Endure When Built Right
Stone walls have graced landscapes—and history—since ancient times. From Roman aqueducts to English garden hedges, well-built stone walls stand for centuries. But slap a few rocks together haphazardly, and you’ll face crumbling joints and leaning facades before you know it. If you want your stone walls to last decades, you need more than heavy stones; you need the right approach. Let’s explore 5 ways to build stone walls that will outlast trends, weather, and even your own lifespan.
Way 1: Stone Walls – Choose the Right Stone for Longevity
Selecting Durable Natural Materials
Not all rocks were created equal. To build stone walls that stand the test of time, opt for stones with high compressive strength and low porosity. Materials like granite, bluestone, and quartzite resist weathering, while softer stones like limestone and sandstone may require more maintenance.
Local vs. Imported Stones
Using local stone reduces shipping damage and cost, and ensures climate compatibility. Imported stones can be stunning, but confirm they’re rated for your region’s freeze–thaw cycles. Want a golden hue? Check out sandstone veneers available locally.
Evaluating Stone Hardness and Porosity
A simple scratch test helps gauge hardness, while a quick water absorption check reveals porosity. The less water your stone soaks up, the lower the risk of cracking in cold weather.

Way 2: Stone Walls – Prepare a Stable Foundation
Excavation Depth and Base Material
Your stone walls begin below ground. Excavate a trench at least 6–8 inches deep, then fill it with compacted crushed stone or gravel. This creates a frost-resistant base that prevents heaving.
Using Boulders & Steps as Accents
Integrate boulders & steps at the base for a natural transition between your wall and landscape. These large stones also act as anchors, enhancing stability.
Ensuring Proper Drainage
Water builds hydrostatic pressure behind your wall, leading to failure. Install a perforated drainpipe behind the first course and backfill with gravel to channel water away.
Way 3: Stone Walls – Employ Time‑Tested Construction Techniques
Dry-Stack vs. Mortared Stone Walls
Dry‑stacked walls use no mortar, relying on precise stone fitting and gravity—ideal for rustic garden walls. Mortared walls, by contrast, use cement to bind stones, offering greater strength for structural walls.
Incorporating Natural Stone Slabs for Capstones
Finish your mortared stone walls with a neat row of natural stone slabs as capstones. They protect mortar joints from water and add a polished look.
Interlocking Techniques for Stability
Alternate stone sizes and shapes so that each stone overlaps two below it, distributing load and preventing vertical seams.
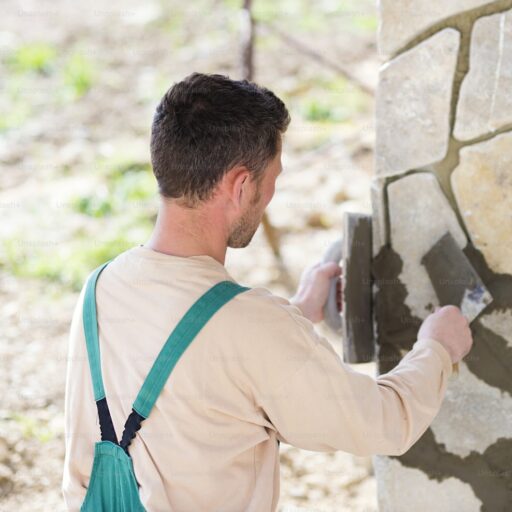
Way 4: Stone Walls – Use High‑Quality Mortar and Joints
Choosing the Right Mortar Mix
A 3:1 sand‑to‑cement ratio with lime offers past flexibility and breathability. Polymer‑modified mortar gives extra adherence, especially on vertical faces.
Mortar Maintenance Tips (Flagstone Care)
Inspect mortar joints annually. Small cracks can be raked out and re‑pointed. Use a matching color mortar to keep your stone walls looking seamless.
Joint Finishing Techniques
Tool joints to slope away from the stone face, shedding water rather than letting it pool and weaken your mortar.
Way 5: Stone Walls – Incorporate Structural Reinforcements
Integrating Geogrid and Wall Stone Retaining Walls
For tall or heavy-load stone walls, embed geogrid reinforcement into the backfill at multiple layers. Pair with wall stone retaining walls for elaborate landscape terracing.
Combining with Pavers & Flagstone for Complex Projects
Use pavers & flagstone in adjacent walkways that tie into your wall design, ensuring cohesive aesthetics and complementary drainage paths.
Adding Weep Holes and Rebar
In mortared retaining walls, install PVC weep holes at the base to relieve water pressure. Embed vertical rebar in mortar joints for added seismic and frost resilience.
Conclusion: Crafting Stone Walls for the Future
Building stone walls that last decades isn’t magic—it’s methodical craftsmanship. From selecting the right stone and laying a solid foundation to mastering dry‑stack techniques, mortar mixes, and reinforcements, these five strategies ensure your walls stand strong through time. Ready to start your project? Explore premium materials and expert advice at Southern Stoneworks LLC and transform your landscape with enduring stone beauty.
FAQs
- How deep should the foundation trench be for a stone wall?
At least 6–8 inches, with compacted crushed stone for drainage and frost stability. - Can I dry-stack a tall retaining wall?
Dry‑stack is best for walls under 3 feet. Taller walls need mortar or geogrid reinforcement. - What mortar mix is best for exterior stone walls?
A 3:1 sand‑to‑cement mix with lime, or polymer‑modified mortar for extra adhesion. - How often should I inspect and maintain my stone walls?
Check joints and drainage holes annually; re‑point small cracks as needed. - Is local stone always better than imported stone?
Local stone suits your climate and reduces shipping costs, but imported stone can offer unique aesthetics if properly rated. - Can I install stone walls myself?
Small, dry‑stack garden walls are DIY‑friendly. Larger or mortared walls benefit from professional installation. - Where can I find coordinated stone and paver products?
Visit Southern Stoneworks LLC for boulders, slabs, veneers, pavers, and retaining wall stone.
Welcome to our blog, we provide best virgina Sandstone for you!