So, you’re ready to transform your backyard, patio, or garden into a Pinterest-worthy masterpiece. Awesome move! But before you dive headfirst into the world of stone slabs, there’s something you need to know—installation is everything. If done wrong, even the prettiest slabs won’t last. But when done right? You’ll have a stunning, durable surface that’ll make your neighbors jealous for years.
In this ultimate guide, we’ll walk you through 5 expert tips for installing stone slabs the right way, with insider tricks and advice from the pros at Southern Stoneworks. Whether you’re a first-time DIYer or a seasoned landscaper, these tips are your golden ticket to a flawless finish.
Why Stone Slabs Are a Game-Changer for Outdoor Spaces
Natural Beauty with Long-Term Durability
Stone slabs are the real MVPs of outdoor landscaping. They’re rugged enough to survive harsh weather, yet elegant enough to elevate any design. They don’t just sit pretty—they last.
Ideal for Budget-Friendly & Upscale Projects
Whether you’re working on affordable landscaping or building a high-end outdoor kitchen, there’s a natural stone slab for you. From rustic charm to modern minimalism, they’re endlessly versatile.
Tip #1: Choose the Right Type of Stone Slab
Know Your Material – Natural Stone Slabs 101
Your project’s success starts with choosing the right stone. Not all slabs are created equal. Do you need something smooth for barefoot-friendly patios? Or textured for a non-slip path?
Check out this handy guide to natural stone slabs to match your style, purpose, and climate.
Tip #2: Prepare the Base Like a Pro
The Foundation Makes or Breaks the Project
Skipping this step is like building a house on sand. Literally.
You’ll want to excavate about 6–8 inches below the surface, lay a compacted gravel base, and then add a layer of sand. This provides the cushion and support your slabs need to stay level and resist shifting.
Need inspiration for base materials and prep work? Check the backyard pavers section for practical ideas.
Tip #3: Use Proper Spacing and Leveling Techniques
Why Evenness is Everything
Unlevel slabs? Tripping hazards, wobbly furniture, and water pooling nightmares.
Use a string line or spirit level as your guiding light. Keep a consistent gap between slabs for jointing material (more on that next!). For style inspo, dive into the patio slabs section.
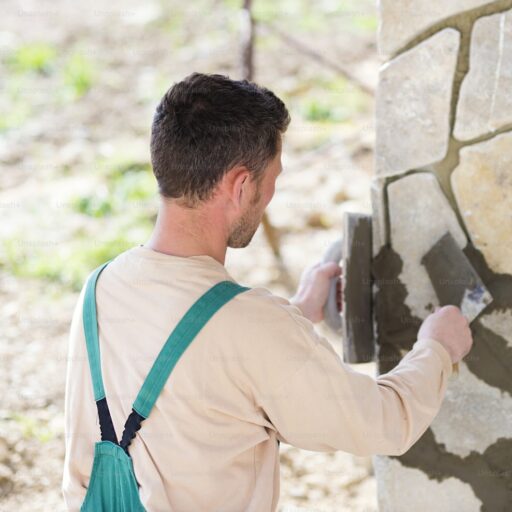
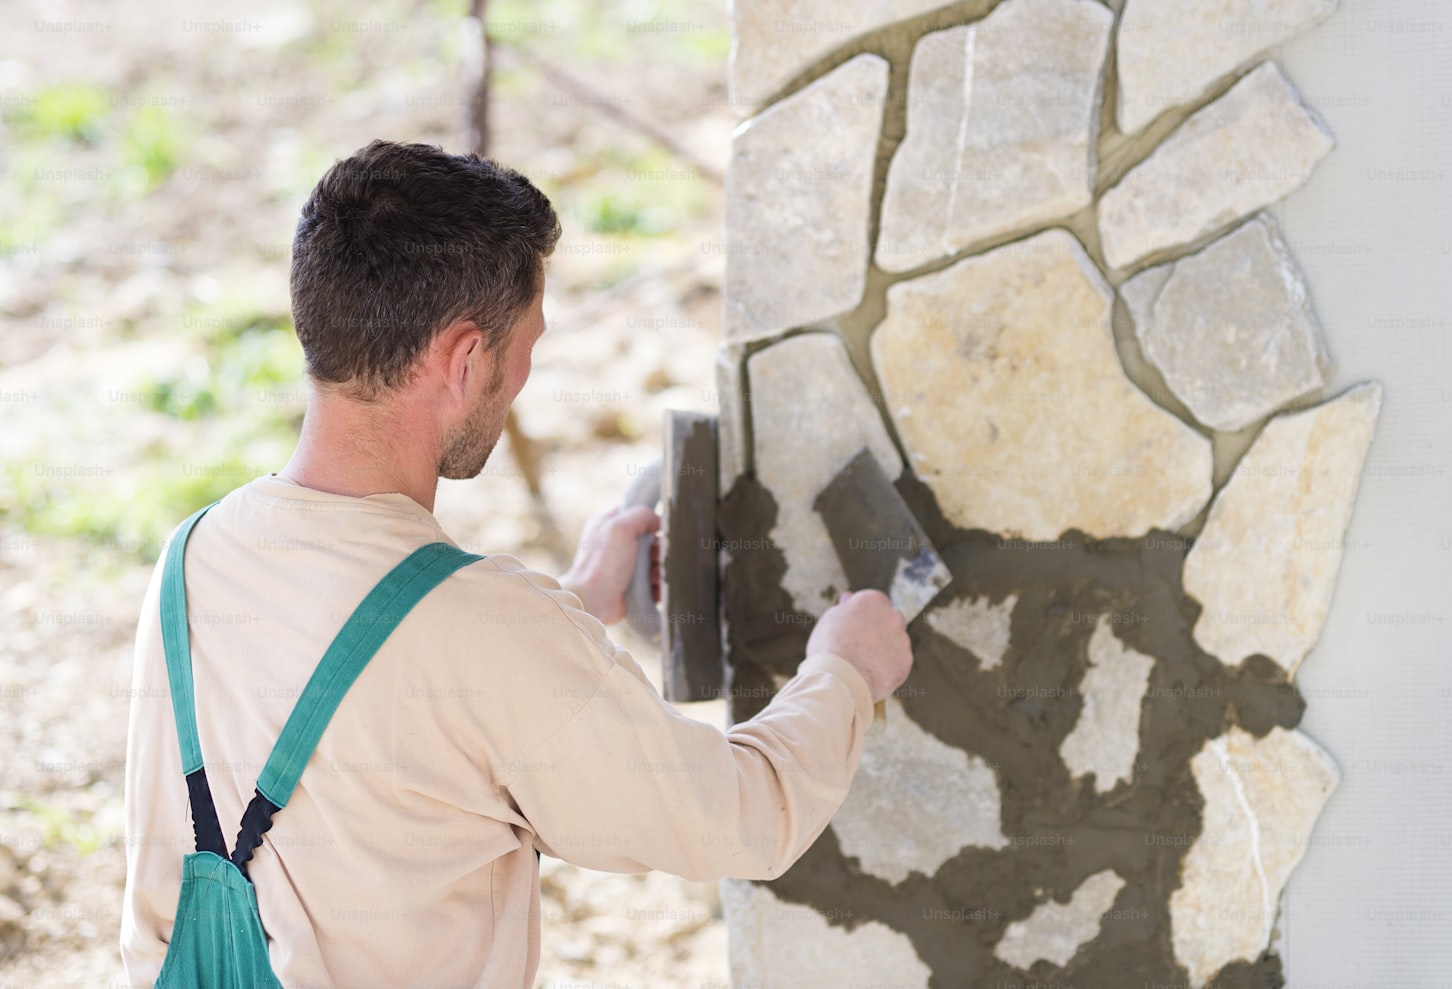
Tip #4: Don’t Skip the Joint Filling
The Secret to Long-Lasting, Weed-Free Joints
This is the unsung hero of stone slab installations. Filling joints with polymeric sand or mortar doesn’t just make your patio look polished—it helps block weeds and bugs from creeping in.
Want more ideas? Visit the stone patio ideas hub for finishing touches that wow.
Tip #5: Seal and Maintain Your Stone Slabs
Weatherproofing and Seasonal Care Tips
Think of sealant as sunscreen for your stone. It protects against stains, weather damage, and color fading. And don’t forget seasonal maintenance—especially in freeze-thaw regions.
For expert advice, check out the flagstone care section to keep your slabs looking fresh year after year.
Common Mistakes DIYers Make with Stone Slabs
Avoid These Pitfalls
- Not compacting the base properly
- Skipping edge restraints
- Choosing the wrong joint filler
- Poor drainage planning
- Forgetting to seal the surface
These little slip-ups can cost big later. Play it smart and avoid them from the get-go.
Best Stone Styles for Different Applications
Sandstone, Flagstone, and Veneers Explained
Each stone has its vibe. Here’s a quick breakdown:
- Flagstone – Perfect for pavers & flagstone patios and walkways
- Sandstone – Great for warm-toned paths or sandstone veneers
- Stone Veneers – Awesome for walls and decorative finishes—check veneer walls
Mix and match depending on your needs!
Adding Depth: Use Boulders and Retaining Walls
Layer Your Landscape Like a Pro
Flat is boring. Add dimension with boulders and steps or break up elevation with retaining wall stone.
This adds drama and structure to your landscape design—plus it’s super functional for slopes.
Using Natural Materials to Create Flow
Design Tips for Seamless Integration
Want that effortless look where everything feels connected? Stick with natural materials. Match your slabs with planters, steps, or even the home’s exterior facade.
This harmony creates a space that feels natural, not forced.
Stone Slab Installation for Different Patio Ideas
Tailor Your Design to Match the Mood
Whether you’re into modern minimalism, Tuscan courtyards, or cozy rustic retreats, your patio should match your personality.
Find ideas tailored to your style in the patio ideas archive. There’s something for every aesthetic and budget.
Wrapping Up: Master Your Slab Installation
Stone slab installation might seem intimidating, but with the right prep, materials, and techniques, it’s totally doable. Remember, every gorgeous outdoor space starts with a solid foundation—literally.
When in doubt, turn to the pros at Southern Stoneworks for guidance, quality materials, and expert tips.
Your dream patio is just a few slabs away. Let’s get to work!
FAQs
1. What’s the best base for stone slab patios?
A compacted gravel base with a sand layer on top is ideal for durability and drainage.
2. Do all stone slabs need to be sealed?
Not all, but it’s highly recommended—especially in areas with harsh weather.
3. Can I install stone slabs without professional help?
Yes, if you’re comfortable with tools and follow proper guidelines. For large or complex projects, professional help is smart.
4. What is the cheapest stone slab option?
Locally sourced stone and budget pavers tend to be the most cost-effective.
5. How long do stone slabs last?
With proper installation and care, decades! Natural stone is incredibly durable.
6. How often should I reseal my stone slabs?
Every 2–3 years is a good rule of thumb, depending on weather and usage.
7. What can I use between stone slabs?
Polymeric sand is the most popular option. It hardens and prevents weed growth and shifting.