Sandstone patios are like a warm handshake from nature—strong, welcoming, and timeless. If you’re dreaming about a backyard upgrade that’s both stunning and sustainable, installing a sandstone patio might just be the perfect weekend warrior project. In this guide, we’ll walk you through every single step of the sandstone patio installation process. Let’s get your outdoor space dialed in.
Introduction: Why Sandstone for Your Patio?
Let’s be real—choosing the right material for your patio can be a bit overwhelming. But sandstone? It checks all the boxes. It’s durable, weather-resistant, easy to work with, and visually beautiful with natural variations that give it a one-of-a-kind look. Whether you want something rustic or modern, sandstone delivers.
👉 Pro Tip: Visit Southern Stoneworks LLC to explore various natural stone options tailored for patios.

Step 1: Planning Your Sandstone Patio Layout
Before you lay a single stone, you’ve got to plan. Think of this like drawing the map before your road trip.
Assessing the Available Space
Walk your yard. Sketch it out. Consider where the sun hits, how close it is to your house, and what you’ll use the space for—dining, relaxing, or dancing under the stars?
Choosing a Patio Design that Matches Your Home
Whether you go geometric or free-form, your patio should complement your home’s vibe. Want something classic? Go for rectangular patterns. Prefer organic and natural? Free-form flagstone is your best friend.
Step 2: Selecting the Right Sandstone
Choosing your stone is like choosing the paint color for your living room—it sets the tone.
Understanding Sandstone Types
Not all sandstone is created equal. Let’s break it down.
Flagstone, Slabs, and Sandstone Veneers
- Flagstone and Pavers: Irregular shapes, perfect for naturalistic designs.
- Natural Stone Slabs: Large and uniform for sleek styles.
- Sandstone Veneers: Best for decorative walls or accents.
Color Variations and Finishes
Sandstone comes in reds, golds, greys, and everything in between. Match your stone to your house color or garden theme for harmony.
Step 3: Tools and Materials You’ll Need
Here’s your shopping list:
- Shovel & wheelbarrow
- Gravel & sand
- Level, measuring tape, string
- Wet saw or stone chisel
- Rubber mallet
- Jointing compound or polymeric sand
- Sealer (optional, but recommended)
Having the right tools makes everything smoother—trust us.
Step 4: Preparing the Foundation
No one wants a wobbly patio. Prep like a pro.
Clearing the Area
Remove sod, roots, and any debris. Dig down 6-8 inches depending on your region’s frost line.
Setting a Stable Base with Gravel and Sand
- Lay 4 inches of crushed gravel.
- Add 1-2 inches of sand over that.
- Compact it with a plate compactor.
- Check for level and slope (away from your house!).
Learn more about base prep on Southern Stoneworks’ Sandstone Basics page.
Step 5: Laying the Sandstone Pieces
Here’s where the magic happens.
Dry Lay First to Visualize the Design
Before mortar or sand comes into play, lay your stones down to see how they look. Adjust gaps and positioning as needed.
Setting the Stones in Mortar or Sand
- For a flexible surface: Set stones on sand and tamp them gently.
- For a permanent set: Use mortar underneath each piece.
- Always use a level—trust but verify.
Step 6: Cutting and Shaping the Stones
Sometimes you need to customize your pieces.
Tools for Precision Cuts
Use a wet saw with a diamond blade for clean cuts. For a more rustic edge, a stone chisel works too.
Safety Tip: Always wear goggles and gloves!
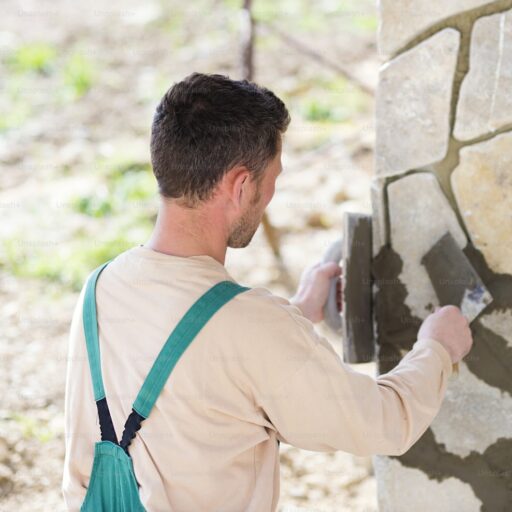
Step 7: Filling the Joints and Sealing
You’re almost there—let’s lock those pieces in.
Choosing the Right Jointing Material
Polymeric sand is your best bet for a weed-free finish. Sweep it in, mist it with water, and let it cure.
Sealing for Longevity
A good sealer helps preserve color and resists water stains. It’s especially useful in freeze-thaw climates.
More info here: Sandstone Maintenance Guide
Step 8: Adding Borders and Retaining Walls
Borders give your patio that finished, polished look.
Integrating Wall Stone or Retaining Features
Use Wall Stone and Retaining Walls to create elevated edges, garden beds, or seating.
Step 9: Finishing Touches with Boulders and Steps
Want to elevate your patio’s style?
Enhancing Aesthetics and Function
Add Boulders and Stone Steps around the patio for a natural, cohesive feel. Plus, they double as seating or focal points.
Step 10: Long-Term Sandstone Maintenance
Patios aren’t “set it and forget it”—a little TLC goes a long way.
Seasonal Upkeep and Cleaning
Sweep regularly, rinse off dirt, and use a mild detergent if needed. In winter, avoid salt—use sand for traction instead.
Recommended Maintenance Products
Refer to Sandstone Maintenance Resources for sealers, cleaners, and more.
Conclusion: Enjoy Your Timeless Outdoor Upgrade
There you have it—your roadmap to a flawless sandstone patio installation. From planning and prepping to finishing and maintaining, every step is doable with a bit of effort and the right know-how. A sandstone patio doesn’t just add value to your home; it adds a daily dose of joy every time you step outside.
Ready to make your dream patio a reality? Check out all your natural stone options at Southern Stoneworks LLC—they’ve got everything you need to get started.
FAQs
- How long does it take to install a sandstone patio?
Typically, 2–5 days depending on patio size and prep work. - Can I install a sandstone patio myself?
Absolutely! With the right tools and guidance, DIY is totally doable. - Is sealing sandstone necessary?
It’s optional but highly recommended for longevity and color preservation. - What’s the best base for sandstone patios?
A compacted gravel base topped with sand provides great drainage and stability. - How do I prevent weeds between sandstone slabs?
Use polymeric sand in joints—it hardens and blocks weed growth. - What’s the difference between flagstone and sandstone?
Flagstone is a shape/style; sandstone is the material. You can have sandstone flagstone! - Where can I buy sandstone for my patio?
Visit Southern Stoneworks LLC for a top-notch selection of sandstone slabs, pavers, veneers, and more.