Why Stone Steps Are Ideal for Hillside Landscaping
Building stone steps into a hill can be one of the most rewarding and transformative landscaping projects you can take on. Whether you’re dealing with a steep slope or just want to add a touch of elegance to your hillside garden, stone steps provide both practicality and beauty. Not only do they offer a sturdy way to navigate uneven terrain, but they also add a timeless aesthetic that enhances any landscape.
In this article, we will explore 10 best practices for building stone steps into a hill, ensuring your project is successful, functional, and long-lasting. From assessing the terrain to choosing the right materials and designing your steps, we’ll guide you through every stage of the process.
1. Assessing the Terrain Before Starting
Why Site Analysis is Essential for Proper Stone Step Installation
Before you start laying down stone steps, it’s crucial to assess your hillside terrain thoroughly. The slope, soil quality, and any natural features like rocks or trees will all affect how you build the steps. A proper site assessment will help you determine the number of steps, their height, and the materials required for the project.
Tools Needed for Site Assessment
To conduct a comprehensive site assessment, you’ll need tools like a level, measuring tape, and a string line. These tools help ensure that your steps are evenly spaced and aligned, providing both aesthetic appeal and safety. A survey of the hill’s natural contours will also help you decide if you need additional support, such as retaining walls, to ensure stability.
2. Choosing the Right Stone for the Job
Types of Stone Best Suited for Hillside Steps
Not all stones are created equal, and choosing the right material for your stone steps is key to the overall success of your project. Some of the best types of stone for hillside steps include:
- Flagstone: Known for its flat surface, it’s easy to work with and creates a rustic look.
- Limestone: A durable choice that provides a natural look and is available in a variety of colors.
- Granite: A very strong and long-lasting option that can handle heavy foot traffic and weathering.
Natural vs. Manufactured Stone
While natural stones like granite and flagstone offer a unique and organic look, manufactured stone can be a more affordable option. Manufactured stones are often engineered to mimic natural stones, offering the same aesthetic with added uniformity and consistency in size and shape.
3. Designing the Layout of Your Steps
How to Design Stone Steps for a Hill
The design of your stone steps will play a huge role in the functionality and visual appeal of your hillside path. Begin by determining the total rise (the vertical distance you need to cover) and divide this by the height of each step. Generally, steps should rise about 6 to 8 inches per step for ease of walking.
Factors to Consider in Step Spacing and Sizing
The width of each step should be wide enough to comfortably accommodate a foot, typically between 12 to 18 inches. Additionally, you’ll need to decide on the overall style of the steps—whether you want straight, curved, or winding paths. The design should follow the natural contours of the hill, offering both convenience and aesthetic appeal.

4. Excavation and Site Preparation
Why Proper Excavation is Crucial for Stability
Before installing stone steps, excavation is essential for creating a stable base. The soil needs to be compacted to ensure the stones don’t shift over time. Uneven or loose soil can cause the stones to settle improperly, leading to instability.
Steps for Preparing the Ground for Stone Step Installation
Start by marking out the area for your steps. Excavate to a depth of about 4 to 6 inches, depending on the size of your stones. You may also need to level the ground, adding gravel or crushed stone to create a solid, even base for each step.
5. Using a Retaining Wall for Support
When to Use a Retaining Wall with Stone Steps
If your hillside is particularly steep, a retaining wall can provide crucial support for your stone steps. Retaining walls help hold back the soil, preventing erosion and giving your steps a stable foundation. Depending on the size and design of the steps, you may need one or more retaining walls to support the entire structure.
The Role of a Retaining Wall in Erosion Control
In addition to offering structural support, retaining walls can also help control water flow. By directing rainwater away from the steps, they reduce the risk of erosion, which could otherwise undermine the integrity of your stone steps.
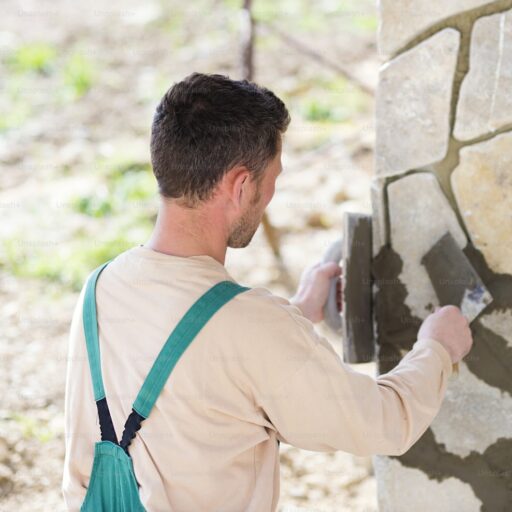
6. Choosing the Right Adhesive or Mortar
Best Adhesives for Stone Step Installation
For added stability, you may want to use adhesive or mortar to secure your stone steps. For natural stone, a strong adhesive that’s weather-resistant will help prevent shifting, especially in areas that experience a lot of rainfall. Mortar is another option, particularly for larger steps that need extra strength.
Mortar vs. Dry Fit for Stone Steps
While dry fit methods, where stones are simply placed together without adhesive, can create a more natural look, mortar offers increased stability. Choosing between the two depends on your personal preference and the specific requirements of your hillside.
7. Building the Steps: Step-by-Step
How to Lay Each Stone Properly for Maximum Stability
Laying stone steps isn’t just about stacking them one on top of the other. Each stone should be placed in such a way that it interlocks with the surrounding stones, ensuring maximum stability. Start by laying the bottom stone and work your way upward, ensuring that each stone is level and secure before moving on to the next.
Tips for Ensuring Level and Even Steps
Use a level to make sure each stone is perfectly aligned, and don’t forget to check the overall alignment as you go along. To create a more natural look, you can vary the size and shape of the stones, but always keep the height consistent for easy access.
8. Proper Drainage and Water Flow Considerations
Ensuring Proper Drainage Around Your Stone Steps
One of the most critical factors when building stone steps on a hill is ensuring proper drainage. Water can erode the soil, destabilize the steps, and eventually cause them to collapse. Make sure there’s proper grading around each step to encourage water to flow away from the steps rather than toward them.
How Water Affects the Integrity of Stone Steps
Over time, water can seep into the joints between stones, causing them to shift or erode. To prevent this, consider installing drainage pipes or French drains along the sides of the steps. These systems will direct water away from the steps and help protect them from water damage.
9. Landscaping Around Your Stone Steps
Enhancing the Look of Your Stone Steps with Landscaping
To make your stone steps even more beautiful, consider adding landscaping elements around them. Plants, shrubs, and flowers can soften the look of the stone steps and integrate them seamlessly into your garden or yard. Additionally, gravel or mulch between the steps can help prevent weeds and make maintenance easier.
Adding Plants, Gravel, and Mulch to Complement the Design
Climbing plants or small shrubs can be placed along the edges of the steps, creating a lush, green look. For a low-maintenance option, cover the soil between steps with mulch or gravel, which also helps with drainage.
10. Maintenance and Care
How to Maintain Stone Steps in a Hill Over Time
Like any landscaping feature, stone steps require regular maintenance to keep them looking their best. Inspect the steps periodically for any signs of shifting or erosion. If any stones become loose, reposition them and add fresh mortar or adhesive as needed.
Seasonal Care Tips for Longevity
In colder climates, freeze-thaw cycles can damage stone steps. To prevent this, apply a sealer that protects against moisture penetration. During the fall, clear away leaves and debris to prevent them from collecting between the stones, which could create a slippery surface
Conclusion
Building stone steps into a hill is a great way to add charm and functionality to your outdoor space. By following these 10 best practices, you’ll ensure your steps are not only beautiful but also long-lasting and safe. From selecting the right stones to ensuring proper drainage and regular maintenance, each step plays a vital role in your project’s success.
If you’re ready to transform your hillside with professional stonework, visit Southern Stoneworks LLC for expert solutions. We also recommend checking out these helpful resources:
- Natural Stone Slabs
- Boulders & Steps
- Wall Stone & Retaining Walls
- Pavers & Flagstone
- Sandstone Veneers
Don’t forget to explore:
- Affordable Landscaping
- Backyard Pavers
- Budget Pavers
- Flagstone Care
- Natural Materials
- Patio Ideas
- Patio Slabs
- Stone Patio Ideas
- Sandstone Facade
- Veneer Design
- Veneer Walls
FAQs
- What type of stone is best for steps into a hill?
Flagstone, limestone, and granite are all excellent choices for hillside steps due to their durability and visual appeal. - How deep should each stone step be?
Typically, a depth of 12 to 18 inches is ideal for comfortable footing. - Do I need a permit to build stone steps?
Depending on your location, you may need a permit. Check with your local building authority. - How can I prevent weeds between my stone steps?
Using landscape fabric, gravel, or mulch between steps helps prevent weed growth. - Should I seal my stone steps?
Yes, sealing helps protect against moisture, staining, and freeze-thaw damage. - Can I build stone steps myself or should I hire a pro?
While it’s possible to DIY, hiring a professional ensures the steps are safe and built to last. - How do I deal with water runoff on stone steps?
Install proper drainage systems like French drains to direct water away from the steps and prevent erosion.